Interstate '76 Walkthrough
Local Ditch > Interstate '76 > Walkthrough
Having problems with a particular mission? Then you're in the right place.
This walkthrough will tell you what to do to get through the missions. What it won't do is tell you how to fight or master your enemies. If you need help with that, check out the driving strategies and weapons sections of the site.
| Trip Missions | Instant Action Missions | Training |
|---|---|---|
|
Scene1 Scene2 Scene3 Scene4 Scene5 Scene6 Scene7 Scene8 Scene9 Scene10 Scene11 Scene12 Scene13 Scene14 Scene15 Scene16 Scene17 |
Oil Well Well Mondo Burger Seminole Pretty Bus Race No Shoot Trailer Park Madness Milk Toast |
Training |
Training
The training is pretty straightforward - Just drive around and do what the tape says and don't get yourself killed in the process. Be careful around cliffs and you should be good.
TRIP Walkthrough
Scene 1
After learning that Jade was a vigilante in the movie with Taurus, you head out onto the road.
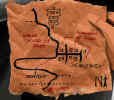 Objectives:
Follow Taurus to Seagraves
Blow up the fireworks shack on the corner
Follow Taurus to the Wagon Wheel Diner and defend it!
Kill all fleeing baddies
Walkthrough:
Follow Taurus to Seagraves. Along the way, you'll take a shortcut on a dirt road. Keep following Taurus.
When you get to Seagraves, find the fireworks store and blow it up. It's straight down the road where you stop, on the left.
After you take out the fireworks stand, you'll hear someone radioing for help from the Wagon Wheel Diner. Follow Taurus there.
When you get there, three creepers are attacking the Diner. After you take one out, the other two will run. To make it a little easier to kill the other two as they flee, shoot the cars until their damage bar is red, but don't kill them. Once they start running, don't let them get away.
| Enemies | Weapons |
|---|---|
| ABX Leprechaun | 1 30cal Machine Gun; Oil Slick |
| Phaedra Coupe | 1 30cal Machine Gun; 1 Fire Rite Rocket; Structo Bumper |
| Phaedra Pony | 1 30cal Machine Gun; 1 30cal Machine Gun (rear) |
After you kill them, the mission ends and you see a short cut scene where Groove meets Skeeter.
Scene 2
"Never get out of the car."
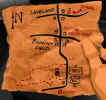 Objectives:
Start up and follow Taurus
Race Taurus to the road. And do good!
Kill Leadsled Gang before they blow up the school in Leveland
Walkthrough:
Follow Taurus. He'll turn off on a dirt road to the left. Stop at the water tower and be prepared to race Taurus. You can pull ahead of him by about a car length and use the oil dropper sparingly to help you win. Hit the jump straight. At the Y after the jump, go right, it's a shortcut. There's another jump at the end of it, so watch out.
Once you finish the race, you'll be known as Swinger. After the race, Skeeter will radio you and let you know someone's about to blow up the school.
Head north up 385. Along the way you'll meet three creepers, where it's marked "Outlaw Territory" on the map. Take them out, and mission will end.
| Enemies | Weapons |
|---|---|
| Phaedra Rattler | 2 30cal Machine Guns |
| Phaedra Pony | 1 30cal Machine Gun; 1 30cal Machine Gun (rear) |
| Phaedra Pony | 1 FireRite rocket; 1 30cal Machine Gun (rear) |
A short cutscene follows, with Groove questioning Taurus about his "radio problems."
Scene 3
Groove, Taurus, and Skeeter hear a creeper called Playboy over the CB telling someone suspicious to hang tight at the Bar-D.
 Objectives:
Destroy the Bar-D
Kill creepers on the way to the Bar-D
Kill creepers defending the Bar-D
Walkthrough:
Follow Taurus. Right before you get to the overpass, Groove will yell, "Creepers on the radar." There are two of them. Take them out. Be sure to watch Master Taurus "do his thing."
Keep heading to the Bar-D. When you get there, you'll have to take down four creepers and blow up the bar.
| Enemies | Weapons |
|---|---|
| ABX Strider | 1 50cal Machine Gun; Blox Dropper |
| Courcheval Manta | 4 50cal Machine Guns; Blox Dropper |
| ABX Leprechaun | 1 50cal Machine Gun; 1 50cal Machine Gun (rear) |
| Phaedra Pony | 1 50cal Machine Gun; 1 50cal Machine Gun (rear) |
| Courcheval Cavera | 2 50cal Machine Guns; 1 50cal Machine Gun (rear) |
| Phaedra Rattler | 2 50cal Machine Guns |
After the mission ends, Taurus searches what's left of the Bar-D and finds a suitcase full of money. Also inside of it are blueprints and plans for something... something big.
Scene4
Groove's in his car asleep, until a voice on the CB wakes him up. It's Patriot, who saw Groove at the Wagon Wheel diner the other day. He recognized Jade's car, and believes Groove to be her. He challenges Jade to a race, and Groove obliges.
 Objectives:
Race Patriot and his buddies for 4 laps
Kill Patriot and take care of his buddies.
Walkthrough:
Race around the track for four laps, but don't shoot any of the other races. They will shoot at you, but don't fire back. Use your oil slick. Watch out for the hills, some of them tend to send you airborne and if you land on your roof, you're dead.
After you win the race, kill Patriot and the others.
| Enemies | Weapons |
|---|---|
| ABX AMZ | 2 50cal Machine Guns; Blox Dropper; Blower |
| Phaedra Palomino | 1 30cal Machine Gun; 1 FireRite Rocket; Oil Slick; Blower |
| Vikea Wagon | 1 30cal Machine Gun; Oil Slick; Blox Dropper; Blower |
Groove wakes up in his car. "Whoah, weird dream." Red clouds fill the screen and a voice says that those who mess with Tony Malochio usually end up dead. "But I don't need to tell you that..."
Scene 5
Groove is awaken by the CB again. "Code sixpack... multiples." Taurus is urgently radioing for help.
Malochio walks up to Taurus' beaten-up car, inspects the bullet hole piercing Taurus and pops a couple of shots through the trunk. He grabs the suitcase.
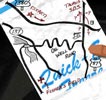 Objectives:
Find Taurus. Try 87 south
Kill any creepers and get Taurus
Meet Skeeter at Fisher's Field. And hurry!
Kill anybody that follows you
Walkthrough:
Be sure that you have nitrous oxide in your car for this mission. Head down 380. Take out the two creepers you meet along the way. Turn south on I '87. There's a dirt road to the left. Head down it and you'll find Taurus. A creeper will attack when you find his car. Take out the creeper and get back to Taurus's car.
A short cutscene will play showing Groove putting Taurus in the 'Rhana. After that, another group of creepers will attack. Continue south down I '87 and get on Oil Well Road. The creepers are radioing for a helicopter, and you have two minutes to get to Fisher's Field and rendezvous with Skeeter before the helicopter arrives.
Don't worry about fighting the creepers; just run. Lay down something from your droppers to buy some time, and avoid the roadblocks and ambushes set up throughout the roadways. Keep your speed up, but brake during tight corners to avoid losing control.
Once you get through Oil Well Road, you'll see that the bridge is out. Hit the nitrous and run through the construction signs. Land smooth on the other side, follow the road and rendezvous with Skeeter. It is possible to make the jump without nitrous! If you don't have any, go full throttle down the last hill of Oil Well Road and hope for the best.
| Enemies | Weapons |
|---|---|
| Phaedra Palomino | 1 20mm Cannon; 1 Aim-Nein Missile |
| Courcheval Cavera | 2 20mm Cannons; 1 20mm Cannon (rear) |
| Courcheval Cavera | 2 20mm Cannons; 1 Gas Launcher (rear) |
| Courcheval Cavera | 2 20mm Cannons; 1 Flame Thrower (rear) |
| Phaedra Pony | 1 50cal Machine Gun; 1 Flame Thrower (rear) |
| Phaedra Pony | 1 50cal Machine Gun; 1 Flame Thrower (rear) |
| Vikea Wagon | 2 30cal Machine Guns; 1 Aim-Nein Missile; Blox Dropper; Oil Slick |
| Phaedra Coupe | 1 FireRite Missile Turret; 1 Aim-Nein Missile |
| Vikea Wagon | 1 50cal Machine Gun; 2 Blox Droppers |
| Phaedra Palomino | 1 30cal Machine Gun; 1 Aim-Nein Missile; Oil Slick |
| Phaedra Palomino | 1 30cal Machine Gun; 1 FireRite Rocket; Oil Slick |
| Courcheval Manta | 1 30cal Machine Gun Turret; 2 30cal Machine Guns; 1 FireRite Rocket; Oil Slick |
| ABX Leprechaun | 1 FireRite Rocket Turret; Oil Slick |
| Phaedra Findley Rattler Talladega | 1 Dr. Radar Missile |
| Phaedra Findley Rattler Talladega | 1 Dr. Radar Missile |
Scene 6
Skeeter's been working on Taurus. He comes out and talks to Groove, "The difference between cars and people... cars are hard to fix."
"Uh, I'm going into Brownfield, get some gas."
Groove arrives at the Gas 4 Cash just to find that it's been blown up. Skeeter sends him to Gas Parade.
 Objectives:
Get gas!!!
Protect the gas station
Kill all creepers
Walkthrough:
Head north up 380 until you see a sign on the right. Head down the road and get your speed past 75 mph. Hit the ramp. Follow the road until splits, then go left. Nail the next three ramps and keep following the road. Finally, hit the last ramp and head north up I '82. Pull up to the Gas Parade.
A cut Scene appears and two creepers show up. Take them out.
After you kill the two creepers, an auto-vigilante will pull up in a flame-painted Pony. Take a light pot shot at it to meet Inferno. She tells you that Cloaker is hitting up all the gas stations.
Four more creepers come. Take them down and protect that gas station!
| Enemies | Weapons |
|---|---|
| Courcheval Cavera | 2 30mm Cannons; 1 20mm Cannon (rear) |
| Courcheval Royal | 3 20mm Cannons; 1 Blox Dropper |
| Courcheval Royal | 3 20mm Cannons; 1 Blox Dropper |
| Courcheval Royal | 3 20mm Cannons; 1 Blox Dropper |
| Courcheval Royal | 3 20mm Cannons; 1 Blox Dropper |
| Phaedra Pony | 2 20mm Cannons; 1 20mm Cannon (rear) |
Scene 7
Time to chase down that Cloaker cat that Inferno told you about in the last mission. Taurus is getting better, but there's no way he's going to be doing any fighting anytime soon, so you're on your own.
After studying those mysterious schematics, the ever-knowledgeable Skeeter concludes that it's an H-Bomb. Something big is going on here, so time to get to it: Find the bomb, avenge your sister, and kill Cloaker.
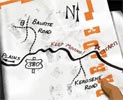 Objectives:
Head west on 380 and get to Plains
Get rid of the pigs! They have been paid to bring you in
Walkthrough:
Start off heading west on 380. After a bit, you'll pass an abandoned road block. A little bit further west and the road block won't be abandoned. There are a lot of cops, and they've got a price on your head.
Take them out. Watch out, as reinforcements and even a chopper arrive, so keep your engine off most of the time. After waxing enough cops, they'll open the gate and let you through.
Scene 8
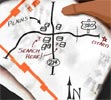
Get to Fletcher & Son's warehouse and roast anyone along the way.
 Objectives:
Go to Plains and find the Fletcher and Sons warehouse
Don't let anything happen to the warehouse! Defend it!
Walkthrough:
Start out heading west on 380. There'll be a creeper waiting. Finish him off and continue traveling on 380.
Another one pops up, so take him down, too.
After reaching Plains, look for the donut shop to the left. Just behind it is the warehouse. Once it's found, a helicopter will take off. Damn, too late.
Now, it's time to protect the warehouse to find out what was in there. A group of four creepers come by in pairs of two. Don't let them touch that warehouse. One is packing mortars, which could possibly blow up everything in the area, so try to attack them to get their attention, then draw them away from the warehouse. After finishing them off, the mission ends.
Scene 9
It doesn't any make sense—there wasn't a clue to be found in the warehouse. But a bomb has to be built somewhere. Checking out the scenery, Taurus spots a spy. Take him out, but don't kill him—he needs to be brought back alive.
 Objectives:
Disable Calisto's car. But be careful not to kill him!
Walkthrough:
Just chase him and shoot until you get him in the red. Since he's a runner, and a fast one at that, you'll want to keep your engine on, which means potentially taking a lot of damage to the front of the car. So, put all of the armor to the front for this mission. If you're a fan of missiles, you might want to hold off on those, since their high damage may accidentally kill him.
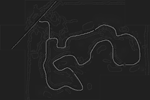 With the right set up (in my case, a 50mm turret and a 7.62 MG), chase him down and shoot him until he's red.
To the right is a map ripped directly from the level. (Thanks to Kalle Siukola.)
| Enemies | Weapons |
|---|---|
| Dover Lightning | 1 25mm cannon; 1 Firerite Rocket Turret; 1 7.62mm Machine Gun (rear) |
Scene 10
After a few moments with Skeeter, Calisto reveals that the bomb is being assembled in Roswell, so it's time to go to New Mexico.
 Objectives:
Check out what's up ahead... it seems the pigs are on to something...
Lure the cops away from the roadblock! See if they will follow you somewhere...
Defend the van until it gets to the town of Tatum!
Walkthrough:
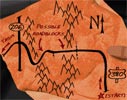
Head down 380. After a short drive, the pigs will have the road blocked off. There's no way that Taurus and Skeeter can make it through, but there are a couple of options:
Number one: Distract the pigs. Head north on the dirt road that's available.
Eventually the 5-0 will figure out you've left and abandon the roadblock to chase you down. Race through that dirt road as fast as possible, and watch out - there's a jump. Once you get through the road, the pigs are all over the Van. Take them out and defend the van. When they've all been turned to pork chops, follow the van to the end of the level, and the mission is a success.
Number two: Got some cajones? Then just take out every cop at the road block. The catch? There're two tanks blocking the road. Just keep your engine off and you should be able to take out the cops. The tanks only seem to fire directly outside the road block, so with the right alignment, you can blast them without taking any damage. To save some ammo, finish them off with the .45.
After destroying the tanks, you'll get a message from Taurus saying that the road is clear. Head down 380 a bit more, and there are another two cops waiting. Take them out, then enjoy the drive to Roswell.
| Enemies | Weapons |
|---|---|
| Courcheval Royale Police Cruiser (Texas) | 1 20mm Cannon; 1 20mm Turret; 1 Blox Dropper; 1 Cup Holder |
| Courcheval Royale Police Cruiser (Texas) | 1 50cal Machine Gun; 1 FireRite Rocket Turret; 1 Blox Dropper |
| Courcheval Royale Police Cruiser (Texas) | 1 20mm cannon; 1 20mm Turret; 1 Blox Dropper; 1 Cup Holder |
| Courcheval Royale Police Cruiser (Texas) | 1 7.62mm Turret; 1 25mm Cannon; 1 Blox Dropper |
| Courcheval Royale Police Cruiser (Texas) | 1 7.62mm Turret; 1 25mm Cannon; 1 Blox Dropper |
| Courcheval Royale Police Cruiser (Sheriff) | 1 30cal Machine Gun; 1 FireRite Rocket; 1 Blox Dropper |
| Courcheval Royale Police Cruiser (Sheriff) | 1 30cal Machine Gun; 1 FireRite Rocket; 1 Blox Dropper |
| Tank | 2 50cal Machine Guns; 1 Tank Turret |
| Tank | 2 50cal Machine Guns; 1 Tank Turret |
Scene 11
You've got to get across the Pecos River and rendezvous with Skeeter and Taurus on the other side.
 Objectives:
Get across the Pecos River alive!
Rendez-vous with Taurus on 380 west
Walkthrough:
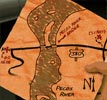
Start out the mission by heading west on 380—the opposite way that the van is going. Soon, you'll reach the bridges. Head across the first one, and before you can reach the second, the creepers blow them both up. Turn around 180 degrees and heading north, there's a dirt road that runs down to the bottom of the river bed.
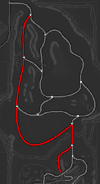
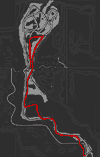 The bottom of the river bed is a maze, so don't get too lost. As you're heading down the dirt road, it will split left and right. Head right. Soon after, it'll merge with another road on the right. Turn around, almost 180 degrees and go down that road. You should be heading South/Southeast at this point. That's the general direction to be travelling throughout the bottom of the riverbed. For more info, click on the map to the right to enlarge it. The highlighted red area shows the path.
There are a ton of choppers flying around overhead, so keep your engine turned off. By now, you should probably be used to cruising with the engine off, but if you're not, you will be by the end of this level. As you head south/southeast on the dirt road, you'll encounter several turrets. Blast them if you like, but as long as you keep your engine off (turning it on occasionally for a speed boost), they're safe to ignore.
What's not too easy to ignore are the jeeps running around across the bottom of the basin. Now, the jeeps only have an averaged 20 points of armor, but they're packing some firepower - Dr. Radars and cluster bombs. Take them out before they can do any real damage.
In the southeast corner of the riverbed, all of the routes should boil down to one road heading almost due east. Follow that road and soon you should see the bridge ahead. The roads will split again, but it doesn't matter which side you take. Drive past the bridge, and you should see a road leading up to it.
Drive up to the bridge and kill your engine. Groove will radio Taurus that he's past the riverbed. The next goal: Rendezvous with the van.
There are turrets everywhere now and choppers buzzing by. Just keep following the road though. It's a long (and potentially slow) drive, but eventually you'll see the paved 380. Turn left to head west down 380. Just a bit down the road await Skeeter and Taurus in the van.
| Enemies | Weapons |
|---|---|
| Glenn Bushmaster | 1 25mm Cannon; 1 Cluster Bomb; Land mines; Blox Dropper |
| Glenn Bushmaster | 1 25mm Cannon; 1 Cluster Bomb; Land mines; Blox Dropper |
| Glenn Bushmaster | 1 25mm Cannon; 1 Cluster Bomb; Land mines; Blox Dropper |
| Glenn Bushmaster | 1 25mm Cannon; 1 Cluster Bomb; Land mines; Blox Dropper |
| Glenn Bushmaster | 1 FireRite Rocket; 1 50cal Machine Gun; Land mines; Blox Dropper |
| Glenn Bushmaster | 1 FireRite Rocket; 1 50cal Machine Gun; Land mines; Blox Dropper |
| Glenn Bushmaster | 1 FireRite Rocket; 1 50cal Machine Gun; Land mines; Blox Dropper |
| Glenn Bushmaster | 1 30cal Machine Gun; 1 20mm Cannon; 1 WP Mortar; Land mines; Blox Dropper |
| Glenn Bushmaster | 1 30cal Machine Gun; 1 20mm Cannon; 1 WP Mortar; Land mines; Blox Dropper |
| Glenn Bushmaster | 1 30cal Machine Gun; 1 20mm Cannon; 1 WP Mortar; Land mines; Blox Dropper |
| Glenn Bushmaster | 1 Aim-Nein Rocket; 7.62mm Machine Gun; 1 Dr. Radar; Land mines; Blox Dropper; Blower |
| Glenn Bushmaster | 1 Aim-Nein Rocket; 7.62mm Machine Gun; 1 Dr. Radar; Land mines; Blox Dropper; Blower |
| Glenn Bushmaster | 1 Aim-Nein Rocket; 7.62mm Machine Gun; 1 Dr. Radar; Land mines; Blox Dropper; Blower |
| Helicopter | 1 30cal Turret |
| Helicopter | 1 Dr. Radar Turret |
| Helicopter | 1 20mm Turret |
| Helicopter | 1 Aim-Nein Turret |
Scene 12
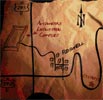
The crew has finally reached Roswell. Nothing strange here, minus the expected UFO. The search for V&N Pneumatics is still on, so it's time to find it.
 Objectives:
Find and identify V and N Pneumatics
Take out the helicopter
Kill Disco
Find a way out of the komplex
Walkthrough:
One note: Make sure you like your car setup for this mission, because you'll be using it for the next two.
The mission starts off at night with Groove asleep, which means the car is off and in park. The joystick and keyboard aren't broken (like I thought the first five or six times I played through). Hit "S" to fire up the car and then hit the ">" key to slide it into Drive.
After that, follow the Coupe heading down the road, but do it with subtlety. Too close and he'll figure out something is wrong and the mission ends. Too far away and he's gone. If you're just in or just outside of radar range, you should be fine. This should go without saying, but don't fire at the Coupe.
If the coupe goes off the radar, just use the map to get to the factory.
When the coupe arrives, Oktoberfest will radio the guards with the passcode: the weather is "unseasonably warm."
Follow suit, head up to the gate and Groove, er, uh, Grover, will say the passcode.
Now that you're inside, just follow the road to the center of the buildings. There's the 'copter and V&N Pneumatics. Since there are a few turrets in the area, kill the engine. Coast up to the helicopter and blow it up.
Once the 'copter's toast, a milk truck will leave and a couple of creepers show up. Finish them, especially that annoying Disco Cat.
Last step is to find a way out. If you go north on the road inside of the Komplex, it leads directly into a building. Blow up the building. After it explodes, it should reveal a ramp inside of it. Back up, get some speed, fire some nitrous (if needed), and enjoy the brief ride.
| Enemies | Weapons |
|---|---|
| Phaedra Coupe | 2 7.62mm Machine Guns |
| Picard Jackrabbit | 2 30mm Cannons; Land mines; Oil Slick |
| Phaedra Palomino | 2 30mm Cannons; Land mines |
Scene 13
After flying into the ditch, not only is Groove knocked unconscious, but he's demolished the engine in the 'Rhana as well. No problem, though, Skeeter has put the van engine in the car. But, the crew needs to get to Spanner's truck stop to get everything repaired.
 Objectives:
Defend Spanner's Truck stop
Find the Tanker
Wait for the Van
Walkthrough:
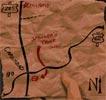
Go south on 285 to get to the truck stop and defend it. Not far down the road, you'll encounter a creeper. Take him out.
Further down, there's another three. Don't let them get away.
At the truck stop, there are another three waiting. These guys have some serious firepower, so be careful.
Once you finish them, Groove will radio Taurus, saying the truck stop is safe. Taurus instructs Groove to hang tight.
In the meantime, a pair of kamikaze Striders will attack from the West. They don't have any weapons, but they'll ram their cars into Spanner's. Make sure that it doesn't happen.
With the Striders gone, one more creeper pops up in a Clydesdale. Finish him.
| Enemies | Weapons |
|---|---|
| Picard Piranha | 1 Dr. Radar; 2 30mm Cannons; Oil Slick |
| Courcheval Courchelle | 1 Dr. Radar; 2 30mm Cannons; Land mines |
| ABX Leprechaun | 1 30mm Cannon; Blox Dropper |
| Picard Jackrabbit | 2 30mm Cannons; Blox Dropper; Land mines |
| Courcheval Cavera | 2 30mm Cannons; Land mines |
| Courcheval Cavera | 2 30mm Cannons; EZK Mortar (rear) |
| Phaedra Clydesdale | 3 30mm Cannons |
| ABX Strider | No Weapons |
| ABX Strider | No Weapons |
| Phaedra Rattler | 1 30cal Turret; 1 50cal Machine Gun |
Scene 14
At Spanner's, Taurus overhears that the creepers are going to Ft. Davis. The van is repaired, but needs a moment to start. Before it can, the Fuzz shows up.
 Objectives:
Protect the van at the truck stop until Taurus can start it up!
Escort and defend the van to the county line!
Walkthrough:
Three cops arrive. Take them out. The police vans have a lot of armor, but because of their size, they're easy .45 targets. Get'em red and put a cap in their head.
The van will probably start while fighting these cops or shortly after finishing them. Defend the van at all costs.
Head South. It's safe to venture off in front of the van, no enemies will come from behind.
There will be another pair of cops. Take care of them.
Down the road, there are another two that are willing to ignore you to hit up the van. Stop them before they can.
There's another pair after that. Take the cops out and ensure that the van gets across the county line. Cops in the next county aren't in one the deal.
54 miles ahead is the world's largest robot...
| Enemies | Weapons |
|---|---|
| Courcheval Royale Police Cruiser | 1 30mm Cannon; 1 30mm Turret; Land mines; Nitrous Oxide |
| Police Van | 1 20mm Turret; 2 7.62mm Machine Guns; 2 Blox Droppers; Heated Seats |
| Police Van | 1 20mm Turret; 2 7.62mm Machine Guns; 2 Blox Droppers; Heated Seats |
| Courcheval Royale Police Cruiser | 1 50cal Machine Gun; 1 Fire Rite Turret; 1 Blox Dropper |
| Courcheval Royale Police Cruiser | 1 30cal Machine Gun; 1 Aim-Nein Turret; Land mines |
| Courcheval Royale Police Cruiser | 1 30mm Turret; 1 Fire Rite Rocket; Fire Dropper |
| Courcheval Royale Police Cruiser | 1 30cal Turret; 1 50cal Machine Gun; Blox Dropper |
| Courcheval Royale Police Cruiser | 1 25mm Cannon; 1 25mm Turret; Land mines |
| Courcheval Royale Police Cruiser | 1 20mm Turret; 2 7.62mm Machine Guns; Land mines; 2 Blox Droppers |
Scene 15
Groove is off to find a path to Ft. Davis.
 Objectives:
Find the path to Fort Davis!
Walkthrough:
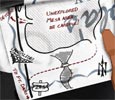
Head into the Mesa. It's a maze again. The easy way through, though, is just to head right whenever there's an intersection. Along the way, there are tons of Striders roaming the desert and some of them are packing some real firepower. They don't have much armor, but since there are so many of them, be sure to bring a weapon with lots of ammo. You don't have to kill them all, but it does make it a little easier and you can get some fancy salvage, like EZKill Mortars and Hades turrets.
 After heading right a couple of times, you should see a sign that says, "This way out."
Head the way it points and go up the ramp. Even though there are a few turrets, don't kill your engine—there are jumps ahead. You shouldn't need any nitrous for this as long as you've got something stronger than the V6 in your car. Just gas it and go. Land smoothly and there's a second jump waiting for you.
After that are more turrets. Kill your engine now and just coast through them. Keep following the road all the way to Ft. Davis.
When you finish, a cutscene will start. As it turns out Ft. Davis is not a town, but a Fort sitting on top of North America's largest oil reserve.
| Enemies | Weapons |
|---|---|
| ABX Strider | 1 7.62mm Turret; Blox Dropper |
| ABX Strider | 1 7.62mm Turret; Blox Dropper |
| ABX Strider | 1 7.62mm Turret; Blox Dropper |
| ABX Strider | 1 7.62mm Turret; Blox Dropper |
| ABX Strider | 1 7.62mm Turret; Blox Dropper |
| ABX Strider | 1 Pyro-Tomic Turret; Fire Dropper |
| ABX Strider | 1 Pyro-Tomic Turret; Fire Dropper |
| ABX Strider | 1 Pyro-Tomic Turret; Fire Dropper |
| ABX Strider | 1 Pyro-Tomic Turret; Fire Dropper |
| ABX Strider | 1 Pyro-Tomic Turret; Fire Dropper |
| ABX Strider | 1 Fire Rite Turret; Land mines |
| ABX Strider | 1 Fire Rite Turret; Land mines |
| ABX Strider | 1 Fire Rite Turret; Land mines |
| ABX Strider | 1 Fire Rite Turret; Land mines |
| ABX Strider | 1 Fire Rite Turret; Land mines |
| ABX Strider | 1 Hades Turret; Oil Slick; Heated Seats |
| ABX Strider | 1 Hades Turret; Oil Slick; Heated Seats |
| ABX Strider | 1 Hades Turret; Oil Slick; Heated Seats |
| ABX Strider | 1 Hades Turret; Oil Slick; Heated Seats |
| ABX Strider | 1 Hades Turret; Oil Slick; Heated Seats |
| ABX Strider | EZKill Mortar; Land mines |
| ABX Strider | EZKill Mortar; Land mines |
| ABX Strider | EZKill Mortar; Land mines |
| ABX Strider | EZKill Mortar; Land mines |
| ABX Strider | EZKill Mortar; Land mines |
Scene 16
It's time to get down to business. Get inside that fort and finish things.
"Jade built a good car. She'll get you through."
"Jade, or the car?" asks Groove.
"Yes," replies Taurus.
Fire incoming. Defend the van, then get inside the fort.
 Objectives:
Cover the van's getaway
Find a way into Fort Davis
Walkthrough:
The van is running for cover; it'll probably be alright, so head down the road to Ft. Davis. You'll find three creepers waiting. Roast them and keep going. At this point, I was packing 2 7.62s in the front (1 turreted), an EZK mortar in the rear and an oil slick. Put both 7.62s on an enemy and they don't last long.
Keep heading to Ft. Davis. There are two more creepers and a chopper waiting. Toast the creepers and take down the 'copter with a turret or a missile.
After that, there's a lone Lightning. Light him up.
At the fort, Groove radios Taurus.
"Tanks, Stampede. They have tanks."
Option 1: To take out the tanks, kill your engine and stay out of their line-of-sight. The tanks can only fire directly in front of them when your engine is off. Stay to the side a bit and unload. After they're destroyed, knock down the water tower behind them. It falls to form a perfect ramp. Get some speed, nail the ramp, and into Ft. Davis we go...
Option number two: Ignore the tanks. In this case, just knock down the water tower. Gun the gas and drive right between the tanks. You should nail the ramps and end up in Ft. Davis the same way.
Another cutscene appears, with Taurus, Groove, and Skeeter tied to chairs as Malochio, like all good villains, explains his plan to blow up the oil reserve to drive up gas prices.
Groove issues a challenge: a last fight. Malochio agrees.
| Enemies | Weapons |
|---|---|
| Phaedra Clydesdale | 3 30mm Cannons |
| Phaedra Palomino | 1 30mm Cannon; 1 Dr. Radar; Land mines |
| Courcheval Courchelle | 3 30mm Cannons; Blox Dropper |
| Courcheval Royale | 2 30mm Cannons; 1 Dr. Radar; Blox Dropper |
| ABX AMZ | 2 30mm Cannons; Land mines |
| Helicopter | 1 Dr. Radar |
| Dover Lightning VX | 1 7.62mm Machine Gun; 1 Fire Rite Rocket; 1 Aim-Nein Missile (rear); Blox Dropper |
| Tank | 1 Turret; 2 30mm Cannons |
| Tank | 1 Turret; 2 30mm Cannons |
Scene 17
Showtime.
 Objectives:
Kill Malocchio...
...and anyone who gets in the way
Walkthrough:
With the 'Rhana trashed from breaking through the walls of Ft. Davis, you can select which vehicle you'd like to use.
In the upper left-hand corner is the helicopter. I wouldn't recommend it past the novelty, but you can select it (even though it doesn't highlight) and drive it into the mission.
On the left is the Courcheval Courchelle. It's the all-arounder and the most similar to the Piranha. It's got average armor and average weapons.
Next is the mail truck - a postal Bushmaster. This thing is loaded to the teeth, but... it doesn't have much armor, with an average of only 20 points. Despite the lack of armor, this is the best choice. It has three cherub missiles, which are freakin' deadly, to put it mildly. Literally, this is "going postal."
Last is the tank, which while it has a lot of firepower, can't move for its life. Try it for the novelty, but I'd avoid it. For some real fun, take it out and switch to the in-dash F1 view.
Make your selection and on to the mission. You'll start off chasing Malochio's green Manta, so get a few pot shots in on him. Soon enough, he'll call in backup. Cloaker and two other goons appear, so take all of four of them out. It doesn't matter what the order is, you can kill Malochio first or last, just finish them.
When they're all toast, the final cutscene loads.
"Never get out of the car."
| Enemies | Weapons |
|---|---|
| Courcheval Manta | 1 30mm Turret; 1 30mm Cannon; 1 Dr. Radar; Land mines |
| Moth Truck | 3 30mm Cannon; 2 Car-E-Racer |
| Phaedra Rattler | 1 50cal Turret; 1 Aim-Nein Missile |
| Phaedra Rattler | 1 30cal Turret; 1 50cal Machine Gun |
Melee Missions
Oil Well Well
A group of creepers are destroying America's (limited?) natural resource - the oil wells.
Get down there and keep those gas prices from skyrocketing.
Objectives:
Get to the oilfield before it's leveled.
Kill all baddies destroying the oil wells.
Walkthrough:
Kill the two creepers who are in the area, then get to the oil fields. Ignore the bridge that's out. Instead, just head east and nail the ramp. It's blocked, but plow through it anyway. You'll want to hit the bridge around 90 - 100 mph. Too slow and you won't make it; too fast and your car will flip off the hill on the other side.
Keep going east until you find a couple of creepers blasting at the oil wells. Roast them and three more will appear. Take care of business and the mission is over.
Mondo Burger
"Groove, how 'bout a burger." First one to the Mondo Burger wins.
Objectives:
Walkthrough:
If you've got the skills, race Taurus and beat him there. No, you can't kill him, but if you'd like, get in front of him and lay down some oil. Just pray that he doesn't flip Eloise.
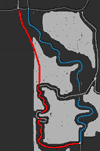 For the driving impaired, here's a shortcut. As soon as the level starts, immediately turn right and there's a dirt road. Don't follow it entirely. The road snakes around and isn't any faster. Instead, follow it west for a bit and when the road turns north, follow it north. When the road turns again, ignore it and keep going north. The dirt road will give your vehicle some traction to get your speed up. After that, don't stop moving. Eventually you should see the Mondo Burger. Taurus will probably be close behind, so get to the parking lot before he does. The map to the right shows the shortcut in red and the usual path in blue.
Before settling into some juicy Mondo Burgers, Oktoberfest and Auto Villains for a Meatless America will show up to ruin the party. They don't like meat, so you've got save America's last great burger joint.
Six villains will come in waves of two, so shoot them, avoid blowing up the burger joint yourself, and send them to the grave.
Seminole
A bunch of locals are holed up in a post office by some creepers. Save'em.
Objectives:
Get to the town of Seminole before the post office is leveled!
Stop the wrecking crew but don't shoot the normals!
Walkthrough:
Start off by heading east down the road. You'll run into two creepers. Finish them off and keep going.
At the stop sign, head north (turn right). Make a left and head west at the next intersection.
There'll likely be another creeper waiting. Don't let him get in your way. Toast him and go.
Make a left at the next intersection. When you see the sign for Seminole, head right.
The mayor will radio in, explaining the situation. Kill the baddies, protect the post office, and be sure not to level the post office yourself. If you take out some buildings, it's not good, but you'll be alright. Folks will radio some funny death sounds, but the mission won't end. Toast the post office, though, and it's mission over. Two creepers are running around, so take them out.
Another two will come after the first wave. Blast'em.
One last creeper appears. Send him to the grave to finish the mission.
Pretty Bus
A school bus full of kids is trying to get to, of all places, school, but some local creepers don't see it that way.
Protect the bus, wax the baddies.
Objectives:
Walkthrough:
Immediately to your left, a couple of creepers are coming. Toast them and don't touch that bus.
After they're done, chase the bus. Another creeper is coming from down the road. Lay him to waste.
With any good story, there's a twist, and the creepers are going to blow up the bridge unless you get there first. Make sure that doesn't happen. When the road forks, go to right and launch yourself over the ramp. Land on the other side and take the shortcut to the incoming creepers. Toast them.
A couple more creepers come. Let them meet the rest of their buddies.
All enemies have to be destroyed for the level to end, so make sure to track down any runners.
Head to the school to ensure the bus made it.
"The safety of children is my job, Mr. Bus Driver."
Race No Shoot
Groove is in some deep shit and the fuzz is on his tail. The only way to shake them is to get to the state line. Only one problem: the road is blocked.
Objectives:
Walkthrough:
Right at the beginning of the mission, four cops are in pursuit. They ain't messing around either, with each one packing 30mm turrets. So, we need to do a little prep work before we enter the mission.
Grab a car with two droppers. Throw on an oil slick and a fire dropper. Load up a ton of armor on the rear of the car, and while you're at it, put on a turreted weapon.
When the mission starts, immediately kill your engine (hit the "S" key) to avoid those nasty po-po turrets. Lay down the oil and fire at the same time (hit "L" to link them) and scatter it all over the road. The cops won't know what hit them. Just keep coasting and don't look back.
Keep heading west towards New Mexico. To your right will be a dirt road. Take it. Going straight on the highway leads right to a road block with more cops. Once you get on the dirt road, the fun begins, as it's uncharted territory. The map doesn't help and it's a maze. So start off by heading right on the dirt road. You should be going west now.
There are turrets at every intersection and choppers flying overhead. Use your turreted weapon to nail those choppers and bring them off their high horses and down to earth. As far as the turrets go, blast them if you want, but make sure you keep your engine off. Coast through the maze as much as possible. As long as the engine is off, they can't touch you.
There may be a few cops chasing you, toast them if you want, or just stay incognito.
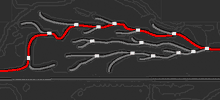 Ok, to get through the maze, follow these directions: Right, left, right, left, right, left, left, right. If you see signs with arrows pointing the way, ignore them. They always point the wrong direction. Remember, the 5-0 aren't your friends here. As usual, the map to the right shows the correct path in red.
When you get out of the maze, you'll see a few concrete barricades. Just drive around them, then head west and hop back on the interstate.
Of course, the fuzz does not want you to cross that state line into New Mexico and they've got another road block set up, completely sealing off the interstate.
Ignore the cops and keep your speed up. On the left side is a water tower/shed/weak building. Blast it. Once it falls, it forms a perfect ramp. Nail that sucker and fly right across the po-leese and their barricade.
"The Swinger is in New Mexico. Repeat, the Swinger is in New Mexico."
Trailer Park Madness
Some creepers have robbed and bank and are hiding in the trailer park. Murder those suckas.
Objectives:
Walkthrough:
Start off heading straight east on the road and go past the ghost town. There's a creeper hanging around a trailer. Roast him and his trailer; then listen to Taurus.
Head back to the ghost town and go north. The dirt road will turn into a highway. Along the way, there'll be another creeper trying to ambush you from a dirt road. Take him out.
Keep following the highway. Another creeper will appear in oncoming traffic. Waste him.
At the truck stop, Taurus warns you there's a live one. No joke - this one is packing some firepower. Don't let him get away; toast him and try to avoid taking too much damage. After the truck stop is secure, head back on the highway.
After enjoying the desert scenery a bit, you'll see a gas station. Keep driving past it.
A small ways up the road, there's an intersection. Head right and you'll find a coupe. The guy is a runner, so blast him before he can go anywhere. Warning: Be careful here. If you fall off the road into one of the ditches on either side, you're out of luck. The runner will get away. So... don't fall off of the road.
The runner is heading towards the warehouses. You can chase him there or take a shortcut. Either way, make sure to cap his ass. Once he's waxed, head back to where you found him.
Lo and behold, it's the trailer park we're after. Two creepers are hiding amongst the trailers. Eradicate them and level any trailer you see, just to make sure the job is done.
Milk Toast
A Milk truck loaded with weapons is making a delivery at a warehouse. Don't let that happen. Destroy it and its convoy.
Objectives:
Walkthrough:
Now, everyone has a different approach to how they like to fight, but mine is not that subtle.
First step: Toast that milk truck. Don't take the sly approach and pick its defenders off one by one. You'll take too much time and damage. Instead, crank the throttle, avoid the other enemies, and get in front of that truck. Drop some fire and say goodbye to that spoiled milk.
Step two: By now, there should be a lot of distance between you and the remaining enemies. Since time is no longer an issue (the truck won't reach its destination), pick the rest of them off one by one. Success.
Last Update: 5/18/2013
 Local Ditch Gaming